Abstract
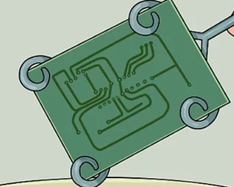
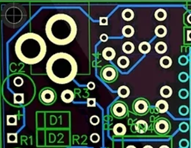
The Process of how to create and make Blank PCB.
Content
1 Introduction
2 Creating a Blank PCB Board
3 Creating a circuit
4 Conclusion
1. Introduction
Blank PCB can be made from substrate and copper wires. Thin wires are bonded to a substrate. A circuit design is then etched into the material and any unwanted material could be removed using a machine. Software such as Eagle CAD can then be used to design circuit patterns on the board. Similarly, a chemical mask pen could be used to draw circuits on the board and the unwanted material may be removed.

In some cases, the blank PCB may have fiberglass or cellulose paper-based material that makes this dust less toxic. Also, it has a resin binder that makes the bits to last longer. The blanks could be large meaning that they can allow for more expansive projects. The blank PCBs are a necessary part of the ever-evolving world. They are required to power the ever increasing electronic needs.
A thin board may be required to help conduct energy depending on the material it is made of. How a PCB is manufactured is critical because it determines whether the board is capable of performing the job it is designed to do or not.
2. Creating a Blank PCB Board
Before you embark on the process of creating a blank PCB, it is important that you chose an appropriate method to use to create the PCB. Of course, the choice of the method will depend on the material you will be using. Also, the method you choose determines the quality of the final blank PCB that you will create. Some of the commonly used methods include:
Acid etching: the method requires that safety measures be put in place. The method requires that you use quality materials if you are looking forward to a quality product. The method is appropriate if tiny wires will be used.
UV etching method: it is one of the methods you can use to transposition the PCB layout on the board. The method requires more expensive materials which may not be available everywhere. It is one of the methods that you can rely on if you want to create quality PCB boards.
Mechanical etching: the method requires that you use special machines to etch away the extra copper from the board. It also helps to route separators in between the wires. The method is expensive but is the most suitable one if you want to make numerous copies of the circuit. It can also produce extremely fine PCBs.
Laser etching: this method is employed by larger production companies. It uses lesser beams to etch the PCB. It requires that one should have special machines to be able to do the job.
3. Creating a circuit
A circuit layout can be drawn using any etchant-resistant material.Also, you may use special markers for this purpose. You can also choose to use lesser printing materials. This can be done by converting the schematic diagram into a printed circuit board layout. This can be done using PCB layout.
Once the blank PCB has been created, you can then print it on a piece of paper. You should then align your circuit diagram on a piece of paper and iron it on the board. The iron box should be placed on the board for 45 seconds to help transfer the circuit to the board.
After you remove the iron, you need to carefully place the circuit to a source of water. This should be done with a lot of care because the paper will be stuck to the board. Also, care must be taken to avoid ripping it out. To remove the circuit, you should immerse the PCB and its content in some hot water for some time. You should then start removing the paper until the whole of it come out. This will leave you with a copper board that has a PCB pad with lines traced out. The next thing that needs to be done is to dry the board by wiping it using a sponge or a napkin. This should be done gently so that the ink does not come out.

Etch the board using any of the recommended processes. It helps to remove any unnecessary copper and leaves just a few wires on your circuit. You may use Ferric chloride as one of the liquids for etching. However, you may opt to use Ammonium Persulfate to do the job. Just ensure that you follow the recommended safety instructions when doing all this. Check if the etchant requires that you dissolve it in water. Ensure that you stir it well before washing the board to remove the copper. Special solvents may be used depending on the goal to be achieved. A sandpaper can be used to do the same job. However, it should be the fine one.
You may also decide to etch it using ultra-violet Transposition. Here you need a photosensitive laminated PCB card. You also need UV insulator and some transparent sheet and a few liters of distilled water. Use a photosensitive spray to spray it on any of the sides of a blank PCB.
4. Conclusion
Creating a circuit is simple but the problem comes in when you start etching. It is a delicate process that requires a lot of care. Choose a method of etching that you understand well and take your time to ensure that you get the best results.
Comments
Post a Comment